This is part two of a buffet makeover, if you want to see the first part,
click here.
I finished sanding the top of the buffet. I always use a low grit sandpaper like a 60 grit for stripping paint off of a piece of furniture. Otherwise you will be sanding for the rest of your life. It can leave marks on your wood though, so you cant be lazy and leave it like that. You need to clean up the marks with a 100 grit paper, followed by a 150 grit and finish with a 200 grit or more paper. This will leave your wood professionally smooth looking and feeling.
I added my Polystain and it looks great. It took 3 coats. I sanded with my 220 grit sandpaper between each coat and also used some steel wool. When the last coat was done, I used steel wool and then rubbed on a furniture wax, then hand buffed it.
It was worth all of the work. The resulting finish is perfect.
I had to copy all of those steps on all the pieces that I was going to stain. So all of the drawers and doors got sanded 4 times, and 3 coats of poly stain then one coat of wax. It didn't take as long as it sounds. The drawers were super fast. Each one only took maybe one minute or less for each type of sanding. The higher the grit on the sandpaper the faster it goes too.
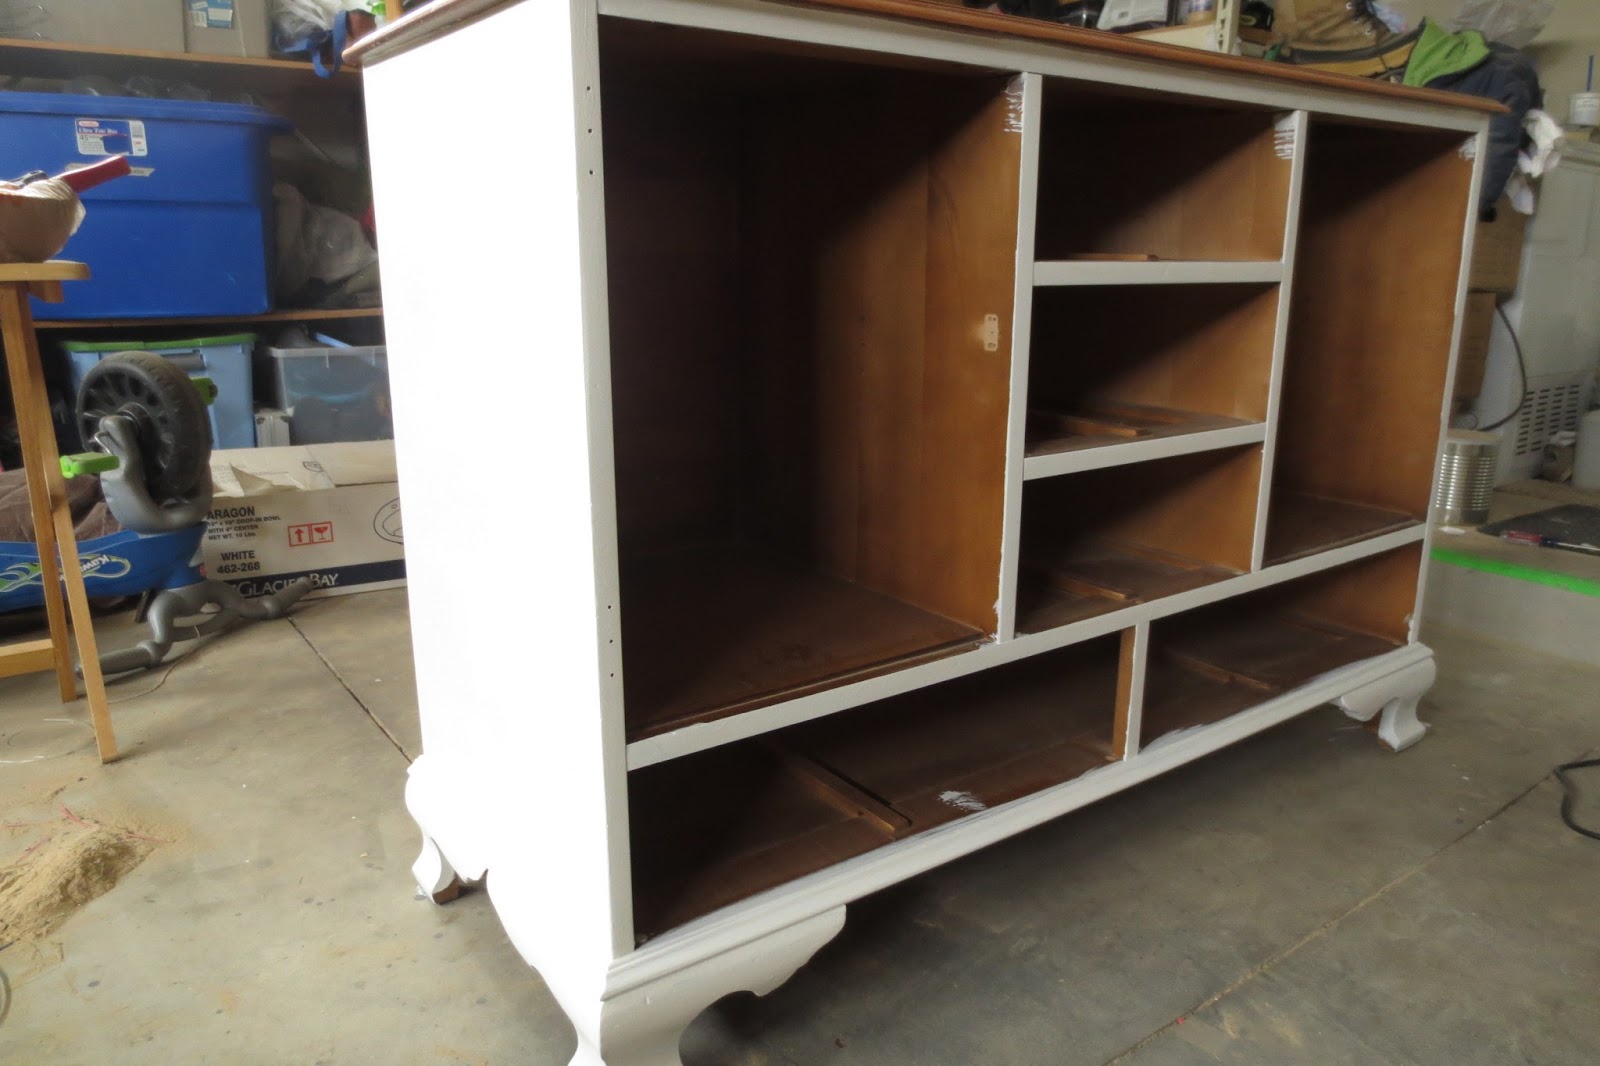
After I finished the top of the buffet, I painted the bottom white to match the hutch. 3 coats and light sanding in between.
I can already tell it is a wining combo from what I have finished so far.
I couldn't get all of the stain out of the shutter doors. Sometimes you have to change your game plan. Going white was my best option, but I didnt want the whole door to be white. I carefully painted each louver of the shutter and every nook and crannie.
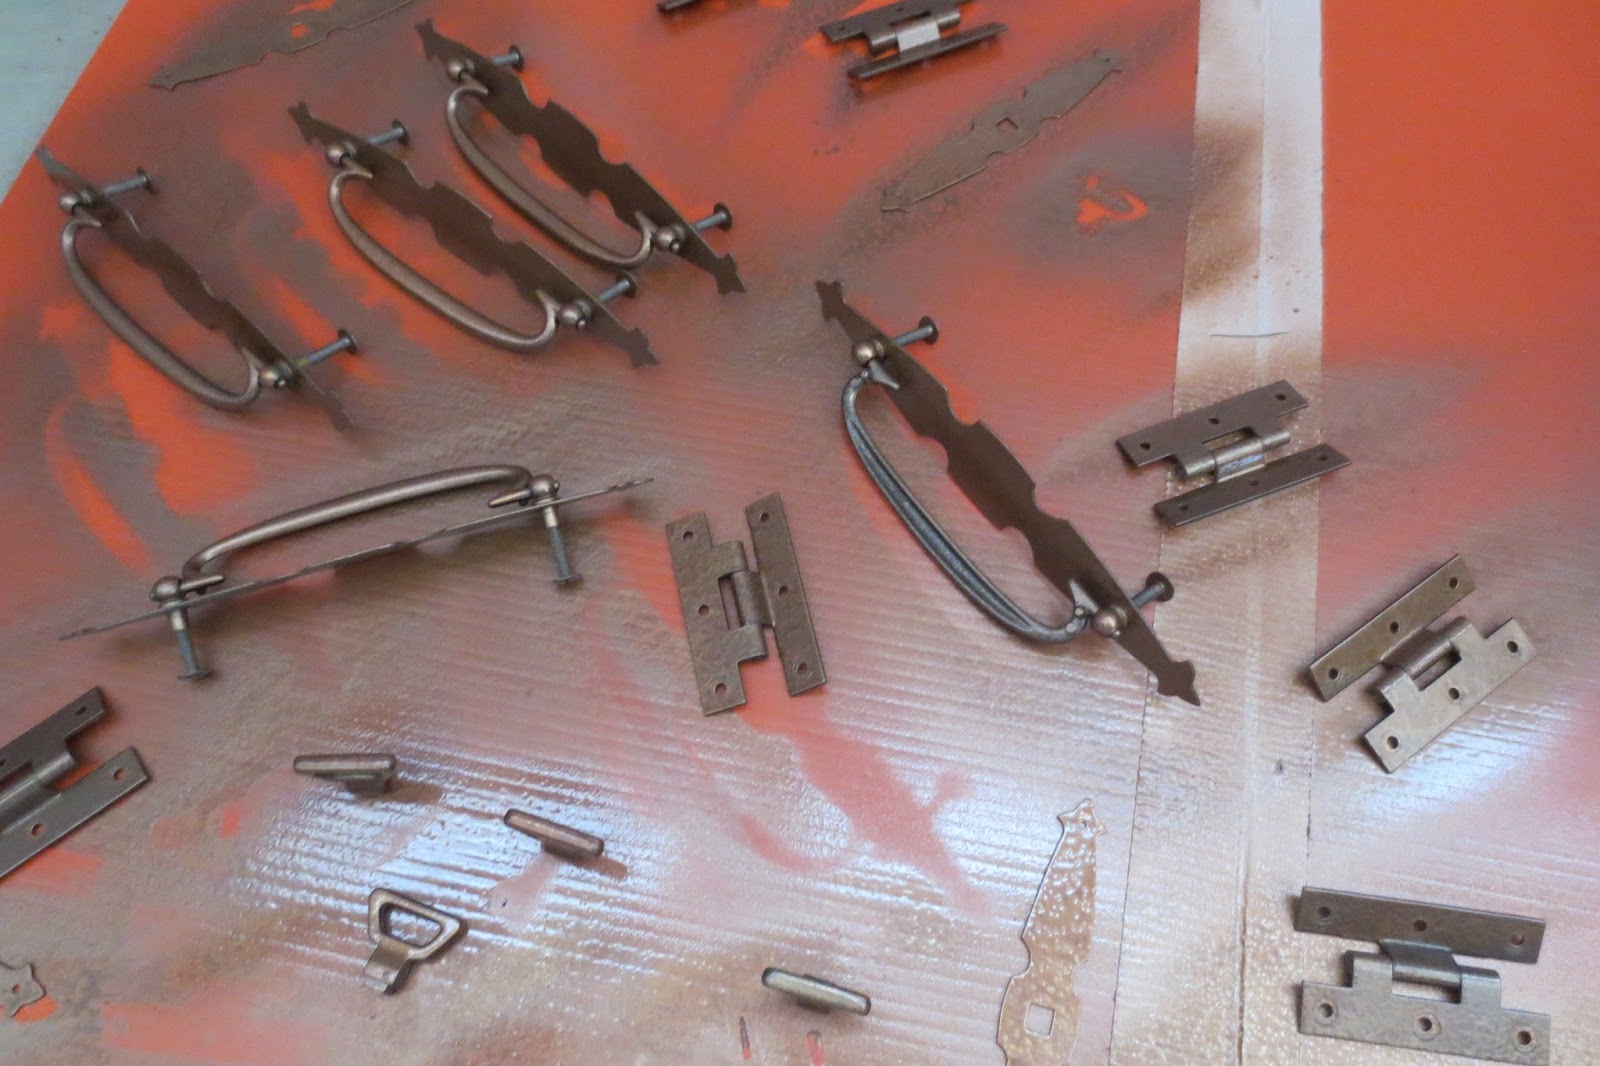
The hardware was original yes, but the color of brass is unappealing to most people. I went with a nice hammered finish enamel paint to give it a face lift. One coat is all it took. Be sure to lightly spray one side, then turn it over and spray the other side after it dries, so you get even coverage. Do not spray the back where the screws go in.
Paint, dry, turn. Paint, dry, turn. Do this until all visible sides of your hardware is covered. Never spray too close or too heavy, or you will have drips.
I carefully, hand screwed all of the dry hardware back where it came from. This was easy since I separated each door in a different bag. I think it looks great just as a buffet. Remember not to use a power drill or you could slip and ruin your new finish
With the hutch on, it looks amazing. I am so happy with it!
It looks like the stain is the same in this before and after pic, however the new stain is much less yellow than the old stain and lighter as well. It shows more of the natural wood grain. Its always such a pleasure to take an old piece, and while maintaining its class and character, give it a little face lift! Good luck with your own furniture refinishing adventures and feel free to message me any questions you may have.


No comments:
Post a Comment